
Add people, roles, and permissions
Create employee records, invite people to the platform, assign stable roles, and test least-privilege access.
Who can do this
Organization Owner or Organization Admin
Primary route
/settings/organization/permissions
Last verified
4 August 2026
- A responsibility matrix for each job function
- The person’s work email and employee details
- Separation-of-duties decisions for Finance and payroll
01
Understand the access model
Organization membership establishes tenant access. The organization role controls administrative authority, while module roles and page grants control day-to-day access.
- Organization Owner: highest tenant authority and continuity owner.
- Organization Admin: manages organization configuration and operational access.
- Organization Member: ordinary tenant member; module/page grants determine available work.
- Permission roles should represent stable jobs such as Finance Preparer, Finance Approver, HR Operator, or Payroll Approver.
02
Create a least-privilege role
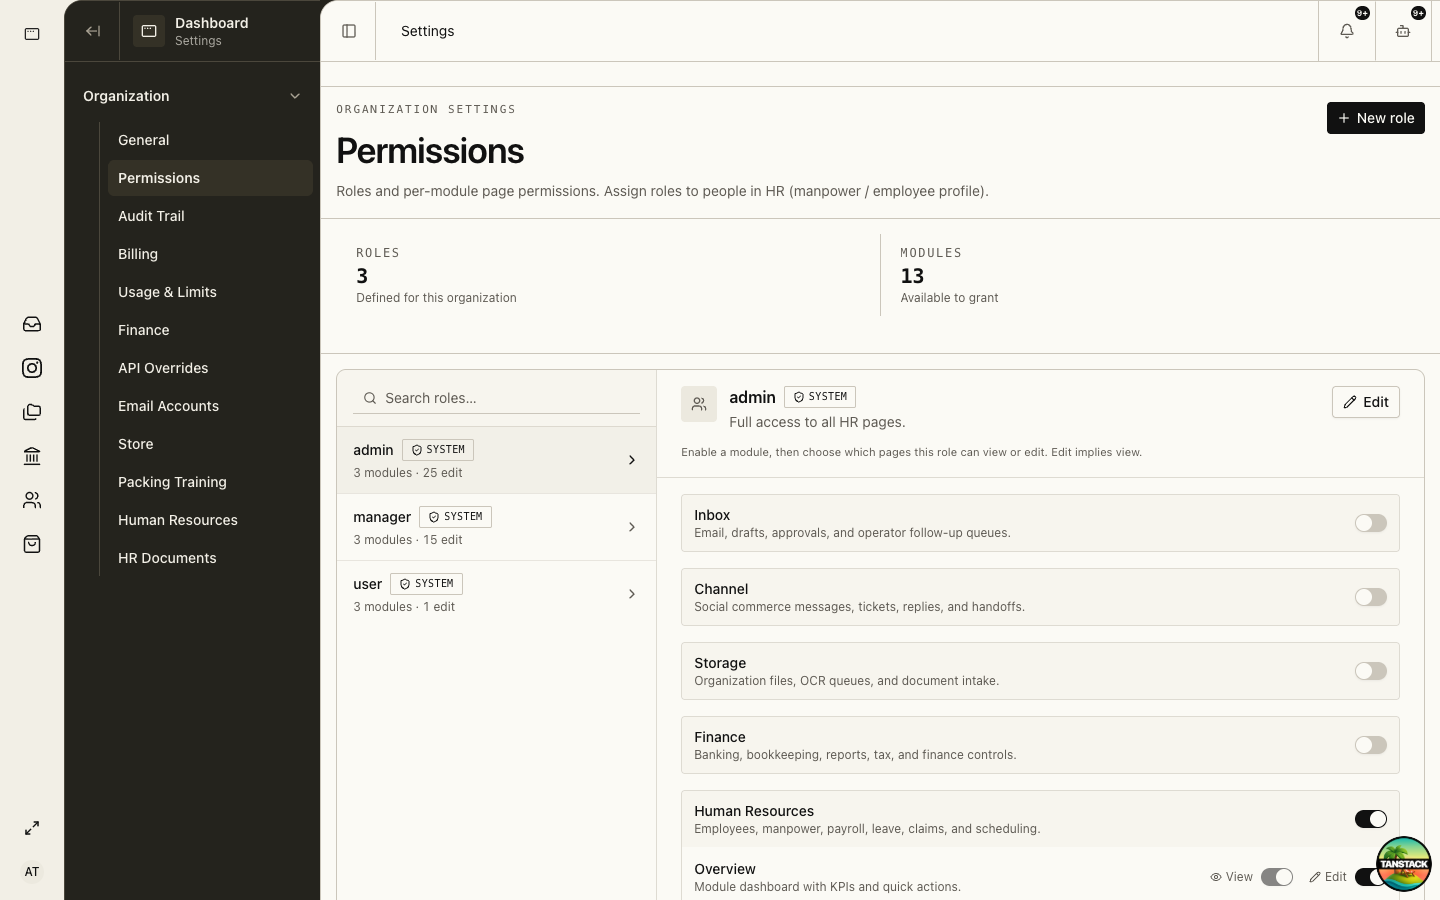
Open Settings → Organization → Permissions. Start with the smallest useful role and add only the modules and pages the responsibility needs.
- Create or select a permission role.
- Enable the required product modules.
- Grant page-level View access before Edit or approval authority.
- Keep preparation and approval in different roles where staffing allows.
- Save the role and review its effective module and page summary.
03
Create the employee, then invite the person
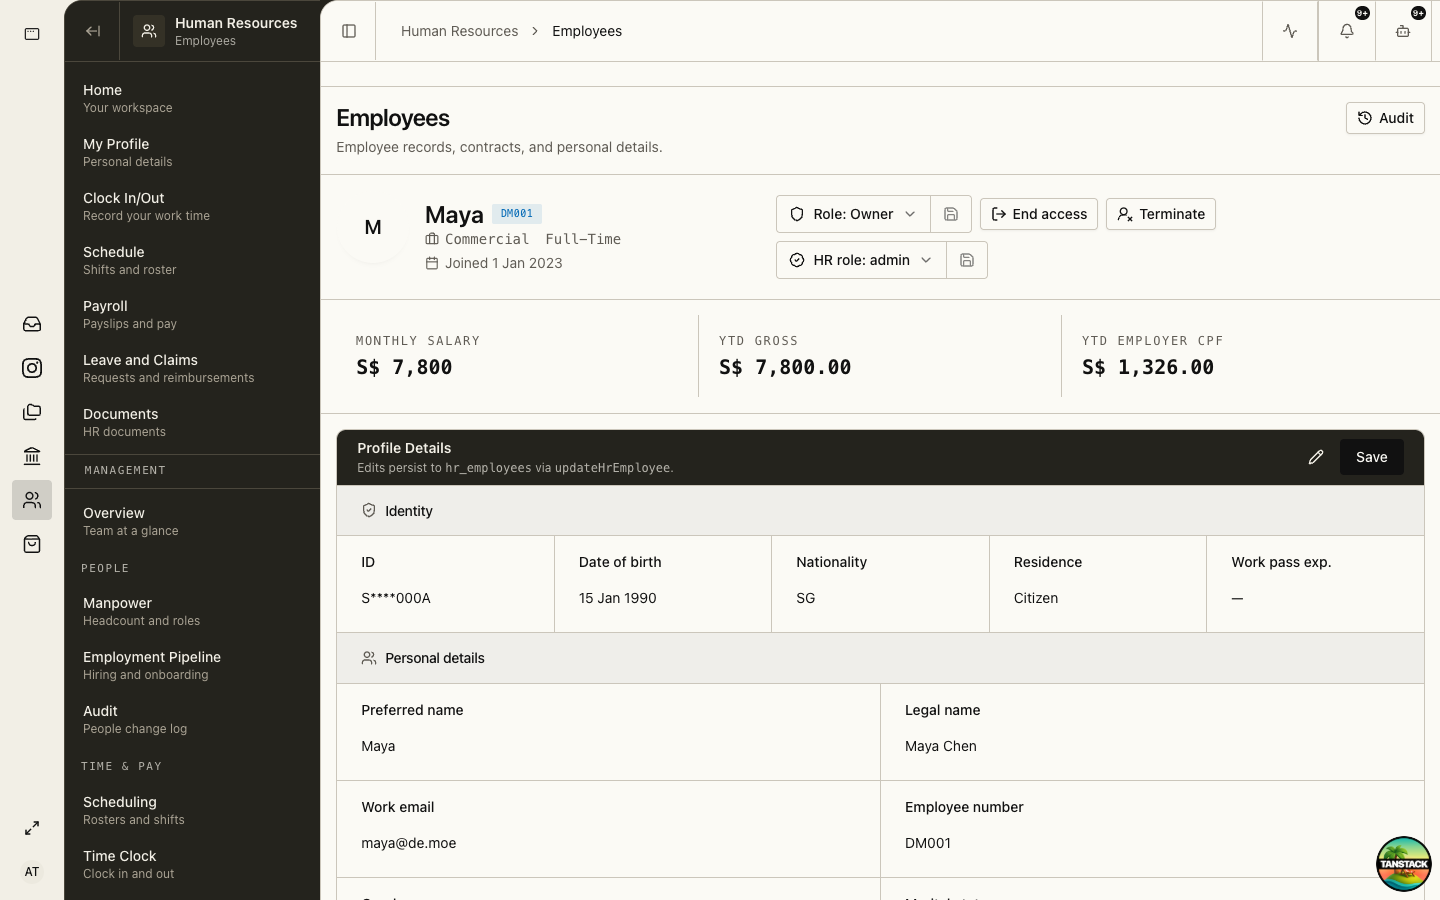
For HR-backed users, create the employee record first so identity, employment, permissions, and self-service remain linked.
- Open Human Resources → Manpower or /hr/employees.
- Create the employee with legal name, work email, employee number, department, and employment dates.
- Open the employee record and assign the appropriate permission role.
- Use Invite to platform from the employee record.
- Ask the person to accept the invitation, secure the account, and confirm the active organization.
Expected result: The employee record has a linked user account and the user sees only the assigned module/page set.
04
Test and review access
A role is not verified until it is exercised as a non-admin user.
- Sign in with a synthetic or designated test member carrying the role.
- Confirm hidden modules and pages cannot be reached by direct URL.
- Complete one allowed read and one allowed write workflow.
- Review Settings → Organization → Audit Trail for the change evidence.
- Repeat access review after transfers, leave, offboarding, or role redesign.
Troubleshooting
- The user has no workspace: confirm invitation acceptance and organization membership.
- The user can enter HR but sees no manager pages: verify their HR permission role and page grants.
- A role change appears ineffective: refresh the session by signing out and back in, then verify the active organization.